Posts

Showing posts from May, 2023

The Best Flower Girl Thank-You Boxes & Gifts

Image
The Best Flower Girl Thank-You Boxes & Gifts Here are some of the best ideas for **Flower Girl Thank-You Boxes & Gifts**:   ### 1. **Customized Jewelry**      - **Necklaces or Bracelets:** Personalize them with her initials, name, or a flower charm.      - **Flower-themed Rings or Earrings:** A small, meaningful token she can cherish.   ### 2. **Personalized Tote Bags**      - Include her name and a fun floral design. Fill it with little goodies like coloring books, crayons, or sweet treats.   ### 3. **Flower Crowns or Hair Accessories**      - Gift her a beautifully made flower crown or hairpins that she can wear during the wedding or as a keepsake.   ### 4. **Miniature Bouquet or Potted Plant**      - Give her a smaller version of the bridal bouquet or a cute potted plant with her name tag.   ### 5. **Keepsake Boxes*...

Gift Plastic Flower

Image

plastic flower Chidiya ka ghosla tokri

Image

Bell Flower Glass

Image

Flower plastic with glass

Image

Colorful Flower Plastic Basket

Image
1. Home Decor: These baskets can be used as decorative accents in homes or event venues. They can be placed on tables, shelves, or mantelpieces to add a burst of color and a touch of nature to the surroundings. 2. Outdoor Decor: Due to their plastic construction, these baskets are often used for outdoor applications. They are resistant to weather elements, making them suitable for patio displays, garden parties, or outdoor events. 3. Craft Projects: Craft enthusiasts may use colorful flower plastic baskets as a base for various DIY projects. They can be painted, adorned with embellishments, or repurposed into unique creations. When selecting a colorful flower plastic basket, consider factors such as size, durability, and design to ensure it meets your specific needs and preferences.

Learn to Make Plastic Red Rose Bouquet for Birthday

Image
Learn to Make Plastic Red Rose Bouquet for Birthday Creating a plastic red rose bouquet can be a fun and creative project for a birthday gift. Here's a step-by-step guide to help you make one: Materials you'll need: 1. Red plastic roses (artificial) 2. Green floral tape 3. Floral wire 4. Wire cutters 5. Ribbon or decorative wrapping paper 6. Scissors Step 1: Prepare the stems Take the plastic roses and trim their stems to the desired length using wire cutters. Keep in mind the overall height you want for your bouquet. Trim all the stems to be roughly the same length. Step 2: Wire the stems Take a piece of floral wire and insert it into the base of one plastic rose. Push it through until it comes out from the top. Bend the wire over the stem, creating a hook-like shape. Twist the excess wire around the stem to secure it in place. Repeat this process for each rose. Step 3: Arrange the roses Hold the wired roses together and adjust their positions until you're sati...

Beautiful Hibiscus Rosa Sinensis Plastic Flower

Image

Exquisite style radiates through this design. Roses

Image

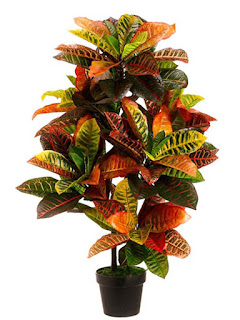
codiaum plastic flower

Image

Ros Roses Vase Red - Plastic

Image

Know which plastic is used to make plastic basil plant

Image

How long do plastic gerbera plants last?

Image
How long do plastic gerbera plants last? Since plastic gerbera plants are artificial and not living plants, they can last for many years if they are well-maintained and kept in good condition.  The lifespan of a plastic gerbera plant depends on a variety of factors, including the quality of the materials used in its construction, the amount of wear and tear it experiences, and the conditions in which it is kept.  With proper care, a high-quality plastic gerbera plant can last for several years or even longer.  However, if the plant is exposed to harsh environmental conditions or subjected to rough handling, its lifespan may be shorter

Learn to make plastic plants for home decoration

Image
Learn to make plastic plants for home decoration To make plastic plants you will need the following materials and tools:  Material:  - plastic caps  - Soil  - Seeds for gardening or growing plants  - jute twine or string  - Water  Device:  - small pen/pencil  - Knife  - bag  - pot/plastic ball  - Note: A place where you can put plants to dry.  Now follow the following steps and prepare the plastic plant:  1. First remove the north part from the top of the caps with a knife or some object.  2. Now fill some soil from inside the cap.  The amount of soil should be such that the roots of the plant fit completely.  3. Now using a pen or pencil make a small disturbance in the center of the cap.  This mess will be for water.  4. Now mix your seeds with some soil.  This will ensure that your seeds are stored in cool places.

Zantedeschia aethiopica Plastic Flower

Image
Zantedeschia aethiopica, commonly known as the calla lily or arum lily, is a popular ornamental plant that is native to southern Africa.  While plastic versions of this plant are available, they are generally considered to be inferior to live plants in terms of aesthetic appeal and naturalness.  Plastic flowers are often used as a low-maintenance alternative to live plants, but they lack the authenticity and beauty of the real thing.  Additionally, they do not have the same health benefits as living plants, which can help purify the air and boost overall well-being.  If you are looking to add the beauty of the calla lily to your home or garden, it is recommended to opt for a live plant rather than a plastic one.  With proper care, Zantedeschia aethiopica can thrive indoors or outdoors and add a touch of elegance to any space

beaded wire red rose plastic flower how to apply in home

Image
If you have a beaded wire red rose or plastic flower that you would like to use as a decorative item in your home, there are a few ways you can do so  1. Make a floral arrangement: You can use your beaded wire red rose or plastic flower as part of a larger floral arrangement.  This could be a centerpiece for your dining table or a decorative piece for a shelf or mantel.  Combine it with other flowers, greenery, or decorative elements that complement its colors and style.  2. Attach it to a wreath: If you have a wreath that you would like to decorate, you can attach your beaded wire red rose or plastic flower to it.  Use wire or hot glue to attach it securely, and position it so that it looks balanced with the other elements on the wreath.  3. Create a wall hanging: Use a piece of string or ribbon to hang your beaded wire red rose or plastic flower on a wall.  You could create a series of these hanging flowers to create a cohesive decorative...

how to make gypsophila plastic flowers

Image
To make plastic gypsophila flowers, you will need the following materials:  - pink, white or red colored plastic material  - Green Flooring Tape  - Spherical ball of thermocol  - Paper Flower Tape  - floral wire  - stained glass  - a small cutter or a knife  Then follow the following steps:  1. Take a small round thermocol ball and wind the floral wire in the middle of it.  2. Twist the ball slightly so that the wire is securely installed in the ball.  3. Apply green flooring tape to the ball.  Slowly move the tape around the ball.  4. Now cut the pink, white or red colored plastic material and cut it into small pieces.  5. Attach the cut plastic pieces around the ball.  You

How to make red and white tribute flower at home

Image
To make a red and white tribute flower at home, you will need:  - Red and white tissue paper or crepe paper  Green floral wire  Green floral tape  - Scissors  Wire cutters  Here are the steps to make the flower:  1. Cut a piece of red tissue paper and a piece of white tissue paper into squares that are about 10 inches by 10 inches.  2. Layer the red tissue paper on top of the white tissue paper, with the white paper on top.  3. Fold the tissue paper accordion-style, making each fold about 1 inch wide.  4. Once the paper is completely folded, tie a piece of floral wire around the center of the folded paper to secure it.  5. Use scissors to round the edges of the folded paper, creating a petal shape.  6. Carefully separate each layer of tissue paper, pulling them toward the center and fluffing them up to create the flower shape.  7. Cut a piece of green floral wire to about 12 inches long and wrap it around the b...

Learn to Make a Lily Sorbet Bouquet

Image
Learn to Make a Lily Sorbet Bouquet Making a lily sorbet bouquet can be a fun and creative way to incorporate the beauty and fragrance of lilies into a refreshing summer treat. Here are the steps to make a lily sorbet bouquet: Materials: - Fresh lilies (choose a variety that has a strong fragrance and bright colors) - Sorbet (you can use any flavor you like, but lighter colors work best for this project) - Wooden skewers - Small decorative vase or jar - Floral foam Instructions: 1. Cut the stems off the lilies so that they are around 3-4 inches long. 2. Rinse the lilies gently under cold water to remove any dirt or debris. 3. Skewer the lilies by inserting the wooden skewers into the base of the flower, taking care not to damage the petals. 4. Place the skewered lilies into the floral foam, making sure that they are evenly spaced and secure. 5. Take the sorbet out of the freezer and let it sit at room temperature for a few minutes to soften. 6. Once the sorbet has softened,...